“Making the Connection”
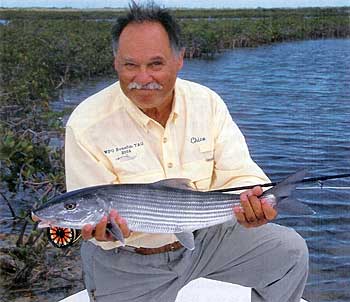
The author prepares to release a hefty bonefish taken on 6-weight tackle, where the proper line-to-leader knot is essential to holding and landing your quarry.
ONCE OR TWICE A YEAR I conduct part of my fly-fishing school out on the flats, where my students and I can spread out to hunt for bonefish. During these sessions, I see all kinds of fly-rod and fly-line combinations, along with a great variety of rigging methods, leader constructions, and knots. Some are very good; some not very good at all.
On one particular day during an incoming tide, several large schools of bonefish roamed around the “classroom.” A few anglers were hooked up, but I noticed one guy who had been fighting the same bonefish for a while. He had the fish in close, but the bone always managed to remain a few yards out of reach. Walking toward the guy, I spotted his problem from 20 yards away: The knot joining the fly line to the butt section of the leader was too big to pass through the rod’s tip top, and the length of the leader allowed the fish to swim out of reach.
Frustrated after several attempts to land his quarry, the angler relieved pressure on the line by lowering the rod tip and pulled the big ugly knot through the tip top. About that time, the bonefish, which had been resting, made another run for freedom.
That nameless knot didn’t make it back out. Instead, it lodged against the tip top, and the tippet snapped. The student and I watched helplessly as the fish headed for deep water, and I explained to him that anytime you fish with a leader that is 10 feet or longer you are going to have to bring the butt section inside the tip top in order to get the fish close enough to land. Therefore, the knot that joins the end of the fly line to the beginning of the leader must be not only strong enough to handle the pressure of a fighting fish, but also small enough to run easily through the guides.
I lent the frustrated angler one of my 7-weight outfits. The leader connection was a small, six-turn nail knot heavily coated with slick fly-line dressing. He made a few easy casts, and in just a few minutes, landed a bone right at his feet. It pays to have a good teacher — but it’s much simpler to learn a few knots.
There are several types of knots that are great for connecting the line to the leader. The knot you choose will depend on your angling needs and the type of fly line you are using.
For Floating Lines
When casting with floating fly line, I prefer to attach a leader with either a nail knot, a needle knot, or the loop-to-loop method. There’s also the Albright Special, which is as strong as or stronger than the nail knot, but it’s too bulky for my taste for light- to medium-weight rods. If you are fishing larger line sizes, such as a 12-weight, a well-tied Albright is fine.
When tying a nail or needle knot, use at least six or seven turns to achieve strength. But make sure that all the turns are tight and even. If the knot is tight on the ends and loose in the middle (that is, fatter in the middle than on the ends), it will eventually slide off. When you finish tying the knot, coat it lightly with a self-leveling finish, such as some fly-tying head cement or Pliobond rubber cement. The finish does not give the connection more strength, but it does enhance its ability to slide through the guides.
The needle knot is a stronger variation of the classic nail knot, and it’s less obtrusive. Here’s how to tie it:

The standard nail knot (top) is fine for most floating fly lines, but for an even slicker, more energy efficient connection (bottom), use a needle to run the butt section through the tip of the fly-line before tying a nail knot. The loop-to-loop method (center) must be small and compact to slide through the guides. This is the standard connection for monocore lines, where 12-pound mono works fine for the nail knot that binds the loop. David Klausmeyer photo.
Shave the butt section of a leader, and thread it through the eye of a needle. Insert the needle into the end of the fly line, and run it up the center about a 1/2 inch. Exit the side wall of the fly line, and free the needle from the leader. Then, pull several inches of leader out through the hole in the fly line, lay the needle against the line, and tie a regular nail knot. Apply a coating of head cement. Now, you have a needle knot, which is slicker than a nail knot. It takes longer to tie, but if you have the time and inclination, it’s worth the effort to learn.
A loop-to-loop connection allows you to completely change leaders in a matter of a few seconds, which is why it’s popular with many anglers. This method of connecting the line to the leader, however, will not slide through the guides as easily as a nail or needle knot.
Take the end of the fly line and make a small loop, about 1/3 inch or so — the smaller the better. Then secure the loop either by serving it with fly-tying thread, or better yet, secure with a six- or seven-turn nail knot using 10- or 12-pound-test monofilament. When you complete the nail knot, cut off both ends of the mono, leaving just the knot to secure the loop. On larger fly lines, say 10-weight or heavier, some anglers use two small nail knots to secure the loop. Even with two nail knots, the loop connection is still very small.
Now, make a small loop at the end of the butt section of your leader. Any loop knot, such as a Duncan, surgeon’s, perfection, or no-slip mono loop, will do. Slide the monofilament loop through the leader loop, and run the tag end of the leader through the loop in the line, and you have a loop-to-loop connection.
Connections for Braided-Core Lines
If you plan to fish in a tropical climate, you’ll want to use fly line that has a braided-monofilament core, which provides increased stiffness compared with other types of fly lines. The extra degree of stiffness helps prevent the lines from wilting in the excessive heat and humidity of the tropics. Fly lines with tarpon and bonefish tapers, for example, have braided-mono cores. Some manufacturers also apply a hard coating to the lines, for added stiffness. These lines work great in the heat, but your choice of connecting knots is limited.
Because of the stiff braided core, you can’t use a needle knot. And loop-to-loop connections work well only if the loop on the fly line is very small — a loop one quarter inch in diameter is not too small. Since the line is stiffer bigger loops will not slide easily through the guides. I usually use seven turns on my nail knot loops with braided core lines. Some of my friends use up to nine turns.
If you want an even smoother connection than a seven-turn nail-knot loop, and want to take the time, here is another connecting knot.
Peel enough coating from the end of the fly line to expose about an inch or so of the braided core. Then, take the bare core and make an overhand knot, but before you tighten it, slip the mono butt section of the leader through it. Then tie a standard nail knot right against the overhand knot. Then, tighten the overhand knot, which will prevent the nail knot from slipping.
Connections for Monocore Lines
Some fly-line cores are made with a single strand of 30-pound monofilament. On a floating line, with regular coating and microballoons for increased flotation, the mono core adds much needed stiffness for fishing the hot, humid conditions in the tropics. When used in a slow-sinking fly line, the clear mono core, together with a clear coating, produces fly line that is practically invisible. This is a great line for many angling situations.

The most critical point in a fight comes when the butt section of your leader enters the guides. Bulky or improperly tied connections will hang up and increase the chance of popping the tippet when the fish makes a final surge.
But getting a knot to hold to monocore lines has taken some trial and error; that’s because the mono, which is slick, and the line often come apart. There’s just no place for a nail knot to grab. And again, the core prevents the use of a needle knot. Fortunately, there are several solutions.
The loop-to-loop connection works fine. Just serve the loop of the fly line with tying thread, or bind the loop of the fly line with a nail knot tied with 10- or 12-pound mono (even though you can’t connect the leader with a nail knot, it will hold the loop secure because it has the doubled line to bite into). Again, make sure the loop-end of the fly line is small.
Another method that can be used with some monocore lines is to peel off four to six inches of the line’s coating, and then, with the section of exposed monofilament, tie an Albright special or a blood knot to connect the butt section. Then, coat the connection with a self-leveling coating or glue to make the rigging slide smoother through the guides.
Shooting Heads, Fast-Sinking Lines
Most sinking lines have cores of braided nylon, and all the knots and associated tips mentioned above will apply. However, some sinking lines these days are made for the tropics, and they may have cores of braided mono.
Instructions for all these knots are widely available on the Internet and in fly fishing books. Familiarize yourself with each of them, and remember that it’s always best to prepare your lines before you get to where you’re going. Don’t assume you’ll figure it out when you arrive. You might find yourself grasping for fish instead of catching and releasing them.


